
Seeds to Plants to Seeds

Exploration and Discovery begins a unit on seeds and plants that grows in depth with each grade level. It includes, science, technology, engineering, art, math, social studies, and literacy.
STEAM Connections & Kentucky Academic Standards
NGSS
Life Sciences - Growth and Development of Organisms, Structure and Function, Ecosystems - K-LS1-1, 1-LS1-1, 1-LS3-1, 2-LS2-2, 3-LS1-1
Physical Science - Structure and Properties of Matter - 2-PS1-1
Math
Counting, Measurement and Data
Technology
Using tools to construct a model of design. Using a computer for research.
Art
Organize, develop, and create artistic ideas and work.
ELA
Reading
Introduction
A seed contains the beginning of a new plant.
Seeds are different colors, sizes, and shapes.
All seeds grow into the same kind of plant that made them.
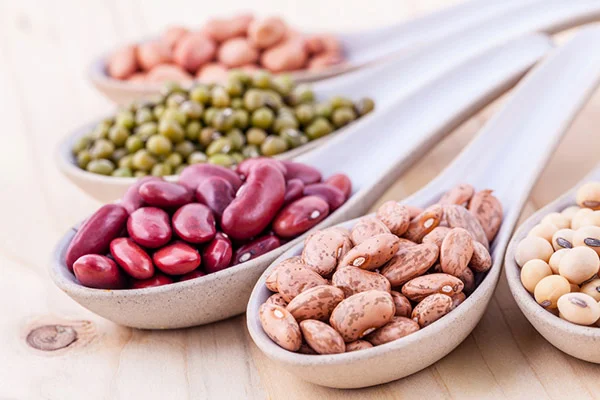
Provide trays of dry seeds for students to touch, examine, and explore as a pre-teaching/learning experience. Bags of 18 bean soup (minus the seasoning packet) are excellent as there are many sizes, colors, and types of beans. These can be stored in air tight containers and used over and over.
Allow students time to enjoy the experience. Next, ask students to work with a partner to sort the beans by color. Use the opportunity to have students sort, count, and classify the beans in several ways. This is an easy and fun math inclusion.

Reading Connections
Oh Say Can You Seed? By Bonnie Worth
How Many Seeds in a Pumpkin? By Margaret McNamara
A Seed in Need By Sam Godwin
My Little Golden Book About Johnny Appleseed By Lori Haskins Houran
From Seed to Plant By Gail Gibbons
From Bird Poop to Wind: How Seeds Get Around By Ellen Lawrence
The Tiny Seed By Eric Carle
Seeds Grow, Seeds Go By Mark Weakland
Activity 1—Where do we find seeds?
Estimated Time: 30-45 minutes, depending on grade level
Materials:
Samples of a variety of vegetables and fruits such as bean and pea pods, ear of corn, melon, squash, apples, oranges (nuts are okay if there are no students with nut allergies)
Magnifying glasses
Paper
Pencils
Watercolors
Procedures:
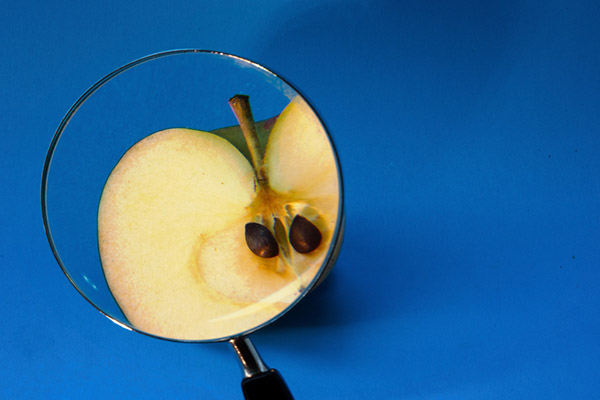
Show the students the basket of fruits and vegetables. Tell the students that seeds are found in the flowers and fruits of plants. Pass around the fruits and vegetables and ask students to use their senses to explore the fruits and vegetables. Then ask if they can tell you where the seeds are located. Most seeds will be inside, but some (corn and strawberries) are visible on the outside.
Cut the fruits and vegetables open to reveal the seeds. Pass them around for students to explore with their senses.
Pair the students and send them to their seats. Distribute paper plates, magnifying glasses, half an apple, and half an orange to each team. Keep the halves together so the teams will get to “open them.” Each student will get their own half piece of fruit to explore. Invite students to look with their magnifying glasses and discover the seeds in the fruit. Ask them to count the seeds they find.
Distribute paper, pencils and watercolors to the students. Ask them to draw the apple and orange half on their paper. Encourage them to write “apple” and “orange” next to their drawings. Invite the students to paint their drawings.
When the paint has dried (watercolors dry quickly), invite students to glue some of their seeds on their paintings where they were found.
Gather the students together and ask them to describe what was different about the seeds in the apple and the seeds in the orange. Accept all answers. Possible answers may include the number of seeds, the size, and shape.
Activity 2—Seed or Not a Seed?
Estimated Time: 20 minutes
Materials:
Small bags containing a seed—be sure to use samples of seeds they have seen in the previous activity
A twig
A small rock (fish tank gravel is good)
Paper plates
Magnifying glasses
Procedures:
Tell students they are going to sort the items in their bags into two groups—Seeds and Not Seeds.
Distribute a plastic bag, paper plate, and magnifying glass to each student. Remind them to use their magnifying glasses to observe the objects then sort them into seed or not seed groups. After a couple of minutes, ask the students to stop. Ask volunteers to explain how they sorted their objects. Assist the students in identifying their object—bean seed, corn seed, tree seed, twig, gravel, etc.
Give students the Seed Sensation Sorting Sheet or write the headings on the board for them to copy.
Read the headings with them. Ask them to glue a few of the different objects onto their sheet in the appropriate columns—Seeds or NOT Seeds. Invite them to label any of the objects. Some may label them as “seed,” while others may be more specific if they know the name (e.g., pumpkin seed, nut).
Ask students to share what they discovered about the objects that were seeds compared to the objects that were not seeds. Discuss how the seeds themselves differ?
Activity 3—What Is Inside a Seed?
Estimated Time: 20-30 minutes
Materials:
Dry beans (lima or pinto)
Magnifying glasses
Beans that have been soaked in water for 24 hours. Allow plenty of extra soaked beans as students will likely need more than one to accomplish the task of dissecting the bean.
Procedures:
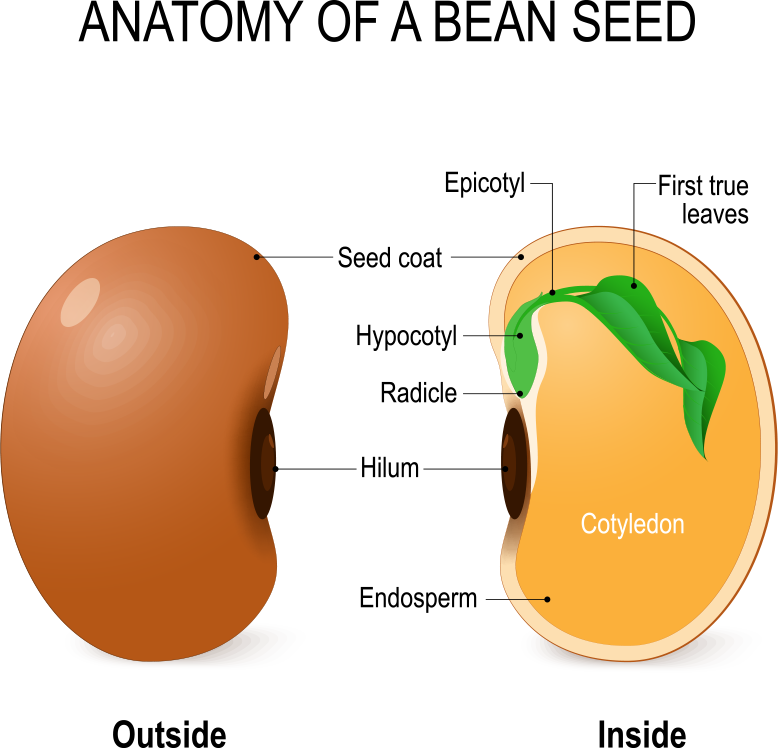
Distribute a dry pinto bean and magnifying glass to each student. Remind them not to put it in their nose, ears or mouth! Ask the students what they think it is. Some will say a bean; others may say it is a seed. Tell them that it is a bean, which is a kind of seed. Ask: What is the job of a seed? Tell them that today we will discover the job of a seed. We will dissect, or open up, the seeds and look inside. Ask the students to open their seeds (without using their teeth) and describe what they see inside.
After a few minutes, ask if anyone has opened their seed. Probably no one has been able. Ask the students what they wear when it is cold outside (a coat). Tell the students that a seed has a coat covering it until it is ready to grow. Right now it is asleep, waiting to wake up. It may sleep for a week, a month or even a year until it has the right amount of water and warmth. The seed will need water and the soil must be warm enough for it to grow.
Distribute the soaked beans to each student. Ask them to compare them to the dry one. Inform the students that these beans have been soaked in warm water to imitate the warm soil. Invite the students to try to open these seeds and observe what is inside using their magnifying glasses. Most will see a new plant growing. If they do not find one, give them another bean.
Gather the students together and ask what they saw inside the seed. Ask one student to draw what they observed on chart paper. Label the parts of the seed for the students with lines extending from the three parts: seed coat (the outer area), food (inside the bean), and the new plant.
Invite the students to draw a picture of the inside of their seed, label its parts, and paint or color the pictures.
Gather the students back together and ask them to tell about the new plant they saw in their seed. Ask the students what they think the new plant will do (grow). Ask: Then what is the job of a seed? (To grow into a plant).
Ask what kind of plant? If they do not readily remember, remind them that seeds grow into the kind of plants they came from. This seed will grow into a bean plant.

Activity 4—Watch the Plants Grow
Estimated Time: 15 minutes for set-up
Materials:
Clear plastic cups
Paper towels
Permanent marker
Spray bottle with water
Bean seeds
Magnifying glasses
Procedures:
Ask the students what we need in order to grow. Accept all answers. Ask them what they think seeds need to make a plant (germinate). Moisture, warmth, and air are the only things required to start the process. Distribute the magnifying glasses and seeds to each student and ask them to examine them.
Distribute the clear plastic cups and the paper towels. Ask students to write their name on the cups using a permanent marker. Ask the students to wad the paper towel and place in the clear cup so that it fills the cup.
Spray the paper towels so they are moist but not dripping wet.
Tell them to wedge their seeds between the paper towel and the cup, half way down and in a row. Show them your sample. Remind them of the things a seed needs to germinate. Ask them to predict how long it will take for the seeds to germinate. What do they think a sprouting seed will look like?
Have the students place their projects near a window. While light is not required for germination to start, the new sprout will need light to thrive. Keep in mind that not all seeds are viable. You may want to prepare a few extra to give to students who received a dud seed.
Each day, have the students check their seeds and draw and label what they observe. You may not want to record each day, but have the students write the day on the Seed Growth Recording Sheet.
Either carefully remove the students’ plants and replant in small clay pots or allow the students to take their plants home to replant with their parents.
Math Connection:
Chart how long it takes seeds to reach different phases, such as root shoot emerges, stem emerges, root begins to branch, seed coat breaks/cotyledons emerge, first leaves emerge. You may be able to collect this data from student’s Seed Growth Recording Sheets.
Digging Deeper
You could also make a few more samples with different variables for the students to compare to their own:
No water
Too much water
Place in a dark cabinet
Place in the refrigerator
Place in a warmer spot
Be sure to label each.
Ask students to predict what will happen to each seed on a piece of paper. After a few days, compare the students’ seeds with your samples. Ask the students why is there a difference? Review student predictions and discuss outcome.
Curriculum Connection - Living Seed Necklace & Lesson
In this lesson, students will model what a seed needs to germinate and a plant needs to survive by creating a wearable mini greenhouse. Grades K-5 with applications for MS/HS.
Materials (includes soybean seed) for this lesson are available at teachkyag.org.
Teachers will also find a digital seed presentation and several worksheets for different grade levels that cover many of the objectives and concepts here.
Activity 5—How Do Seeds Travel?
Estimated Time: 60-90 minutes
Grade Level: 2+
Introduction:
Begin this lesson by asking students how people travel. Depending on where they live, their answers will be anything from walking, biking, riding in cars, on buses, on subways, or trains. List their answers on the board or on chart paper.
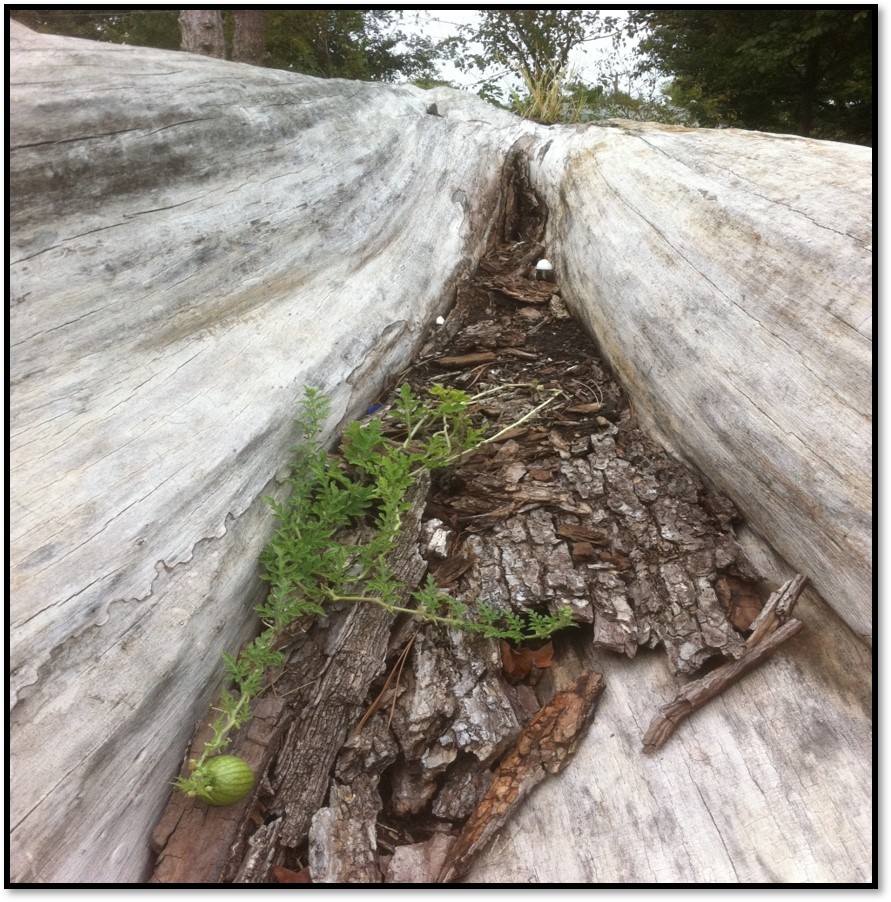
Then tell students that seeds are not always planted in specific places by people. Ask them to think of places where they have seen weeds or flowers, shrubs or trees growing that do not look like people placed them there. (A video or pictures shown on a large screen may help students think of this. Also, a walk around the school will spark their observation skills as well. Point out a plant growing out of a sidewalk or gravel path.)
Ask students how they think seeds move and how they end up growing in places where they were not planted by people. Chart their answers.
Read books about seeds and plants and/or show short video clips that show actual footage of seed dispersal.
BOOK: From Seed to Plant by Gail Gibbons is a great book that supports this entire unit.
VIDEOS
Seeds that Float
Seeds that attach to animals - Hooks & Spikes
Seeds that Catch a Breeze
Seeds that Fly - Seeds ()
Challenge students to think about why seed dispersal is important, and then invite them to investigate various dispersal mechanisms. Discuss the following questions:
Which seeds have been known to travel the farthest?
How do the size, shape, weight, and dispersal strategies of seeds affect the distance they travel?
Students can use this information to help them complete the engineering activity. Consider asking students to create a short video, either in teams or on their own, that explains how they would design a seed that could travel long distances. If they choose to create a prototype, have them film and share their chosen seed dispersal designs in action.
Once students are familiar with the multiple mechanisms of seed dispersal, have them design and test their ideas. For example, students might create prototypes of their designs using organic materials (wood, fiber, paper, etc.) to carry dried lima beans. Students can test their designs to see if they can get their lima beans to:
Float in water for 5 minutes
Stick to an animal and get carried over a distance of 10 feet
Float in the air over a distance of 5 feet
Materials:
A variety of seeds
Hand lens
Fan
Tub of water
Pieces of cloth or fur
Measuring tape
Procedures:
Examine each seed with hand lens. Note any features you think would boost (or limit) its mobility. For instance, does it look like it might stick to something?
Make a prediction about how each seed travels.
Put your predictions to the following tests:
A. The Wind Test—Stand the fan on a chair at the edge of a desk so the center of the fan is aligned with the desktop. Hold each seed 10 cm above and 10 cm in front of the blowing fan. Let go. Record how far it travels. Repeat for each seed.
B. The Hitchhiker Test—Press seeds onto different test materials/fur to see if they stick. Record your observations.
C. The Water Test—Drop seeds one at a time into the tub of water and stir. Record your observations.
Conclusions:
What characteristics do the seeds that passed each test have in common?
Is any one travel trick “better” than the others?
Will all methods work equally well in all environments?
How might the ability to travel in more than one way benefit a seed?
Math Connections:
As part of the “engineering” design challenge above, students will measure distances and durations for each seed traveled.
For an additional math challenge, ask students to scale their design down to size. Using proportions, have students calculate how far or how long their seeds would travel in the real world if the sizes of their designed seeds were reduced (to the size of a milkweed seed, for example).
Seed Art Connection
Throughout history, seeds have been and continue to be an integral part of every culture. Without seeds, there would be no plants for food. Without plants, there would be no animals.
Students can use any type of seeds for making a seed art project. Young students can glue seeds to numbers or letters or their names. They can construct shapes and designs to create sensory works that are beautiful to see and to touch.
Seed Mosaics
Make Maracas with Seeds
Seed Rain Sticks
Hitch Hikers Activity
Collect socks that will fit over children’s shoes. (Ask parents to send in any adult sized socks—mismatched or even with holes in them.)
Have students pull a sock over one of their shoes. Take the class outside and walk through grass and any other areas that might have weeds or other plants with seeds on them.
Come inside and carefully remove the socks, right side out. Place the socks in open clear plastic bags, spray with water and tape the bags onto a sunny window. Keep the socks moist and see what grows out of those socks! This is a fun way to see how seeds become hitch hikers!